- How do I install and uninstall VStomp Amp?
PC
To Install:
1. Run the "VStompAmp_vx.x.x .exe" file you downloaded from our website.
2. Select a folder in which to install VStomp Amp, then click "Next".
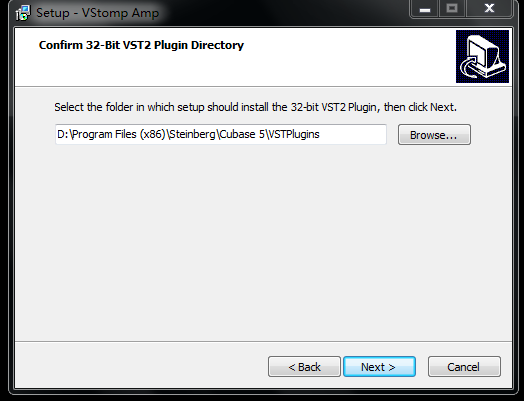
3. Select the folder for your plugins, then click "Next".
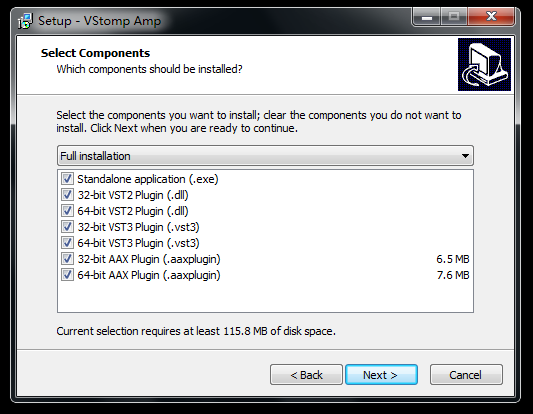
4. Select the components you want to install, then click “Next”.
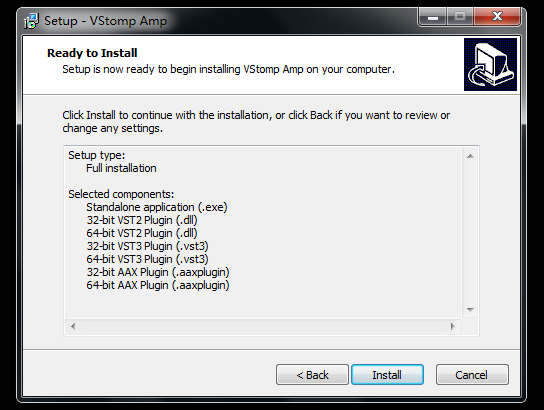
5. Select the additional tasks, do the final check, then click “Install” when you’re finished.
6. Wait for the installation progress to complete.
To Uninstall:
1. Click “Start” – “All Programs” – “Hotone Audio”.
2. Click Uninstall VStomp Amp.
3. Confirm uninstallation, then wait until the uninstallation process is complete.
You can also uninstall VStomp Amp from the Control Panel:
1. Open Control Panel from your Start menu.
2. Select Programs and Features.
3. Find VStomp Amp and click “Uninstall”.
Mac
To Install:
1. Mount “VStomp Amp.dmg” you download from our website.
2. Run “VStomp Amp Installer.pkg” in the image file.
3. Follow the instructions in the installer. The installer will ask you to enter your Mac password to continue.
4. Wait until the installation process is complete.
To Uninstall:
1. Mount “VStomp Amp.dmg” you downloaded from our website.
2. Run “VStomp Amp Uninstaller” in the image file.
3. Confirm uninstallation, wait until the uninstallation is complete.
IMPORTANT: Network connection is required during uninstallation process in order to deactivate the current device you’re using.
- How do I update to the latest version?
- How do I set up my audio interface with VStomp Amp?
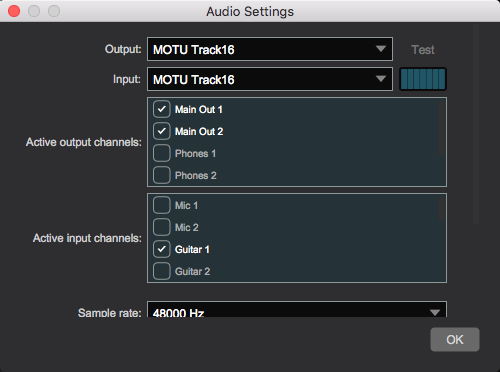
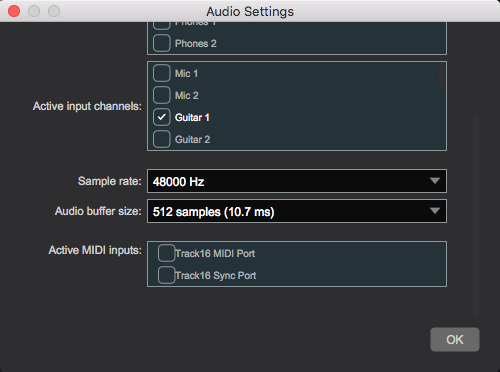
1. Click “Setting” – “Audio Settings”. The following window will appear:
Scroll up
Scroll down
Note: Scroll up and down to check all the audio settings.
2. Choose the input and output channels by checking the
 icon.
icon.The I/O channel content depends on your audio interface - VStomp Amp will automatically detect the audio hardware you’re using, so your audio hardware info should appear here. If not, check your connections and driver status, then reopen the “Audio Settings” window.
Note: If you’re not sure about your settings, click “Test” to generate a test tone; you will hear a test sound on the sound channels you set if everything is OK.
3. Select a sample rate and an audio buffer size. Set this according to your audio requirements and computer/audio hardware capabilities.
Audio Buffer and Latency
The Audio buffer is used to temporarily store audio data while the computer’s main processor switches between different tasks. Because the system cannot process all tasks at the same time, an audio buffer comes to help buffer data from the various processes. The faster the computer, the more calculations it can handle in a short amount of time and the smaller the audio buffer can be. A larger buffer improves overall system stability while the computer handles heavy tasks.
Latency refers to the delay between performing an action (playing guitar) and reproducing the sound (hearing all the effects you set). The larger the buffer size, thegreater the latency, meaning a longer delay between the playing and hearing. For performing or recording, a smaller audio buffer size is recommended; for mixing, a larger audio buffer size is recommended.
Sample Rate
Sample rate is the number of samples of audio carried per second, measured in Hz or kHz (1 kHz=1000 Hz). For example, CDs use a sample rate of 44.1 KHz, which means 44100 samples per second.
Because digital audio recordings are estimations of analog audio, increasing the sample rate will result in a smoother sound.
A more effective way to improve the quality of digital audio is to increase the bit depth, which determines the amplitude range of each sample. 24-bit depth is recommended. You can set the bit depth on your audio interface and DAW (if supported).
4. Select a MIDI input source/controller by checking the
 icon (if connected).
- How do I create a preset?
- How do I backup my presets? Can I use my presets on different devices?
PC: /(Your Username)/My Documents/VStompAmp/Presets
Mac: /User/(Your Username)/Documents/VStompAmp/Presets
To use the presets on different devices, you can copy your favorite presets and paste them to the same folder on different devices.
- What’s the built-in IR loader for?
The VStomp Amp includes 10 free IR files. You can find them at:
PC: /(Your Username)/My Documents/VStompAmp/Impulse Responses
Mac: /User/(Your Username)/Documents/VStompAmp/ Impulse Responses
- Can VStomp Amp be controlled by MIDI?
To use MIDI function, click the MIDI button on the upper right corner of the main window:

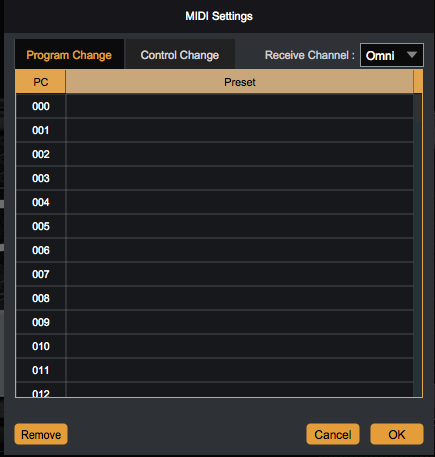
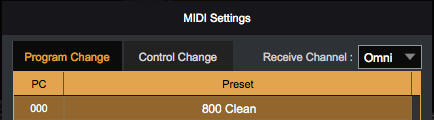
MIDI PC Settings
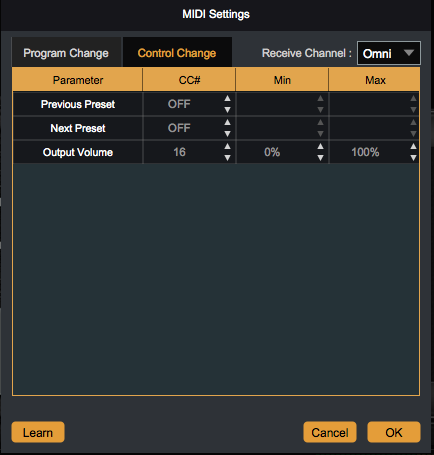
MIDI CC Settings
To select a MIDI channel, click
 . The default setting is Omni (receive messages on all channels).
To assign a preset to a PC number: Click on any empty PC number and select a preset you want to assign, as shown below:
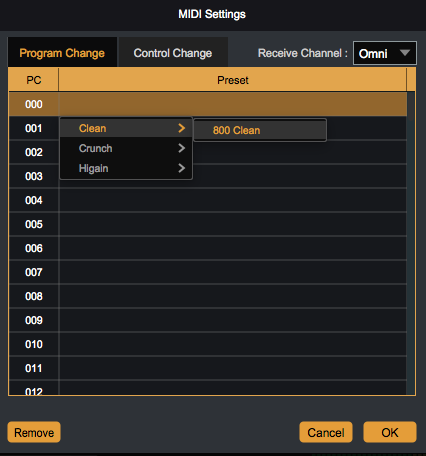
Assigning
Finished
To remove preset assignments, select an assigned PC number and click “Remove”.
VStomp Amp supports MIDI Learn function for setting CC messages. MIDI Learn is a powerful and flexible system that can adapt to the MIDI device you use and allows changes made to any learned parameter to be recorded by the host application. It’s really easy to use: select a function, click “Learn”, press a switch/turn a knob on your MIDI controller, and DONE!
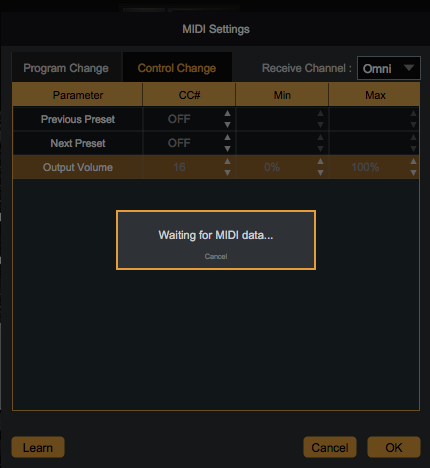
You can also change a CC controller number manually by clicking
 or manually entering a value:

